
Hut Tutorial
Quote from 2DNED on January 31, 2022, 5:58 pmCreate a Building from scratch and adding to game
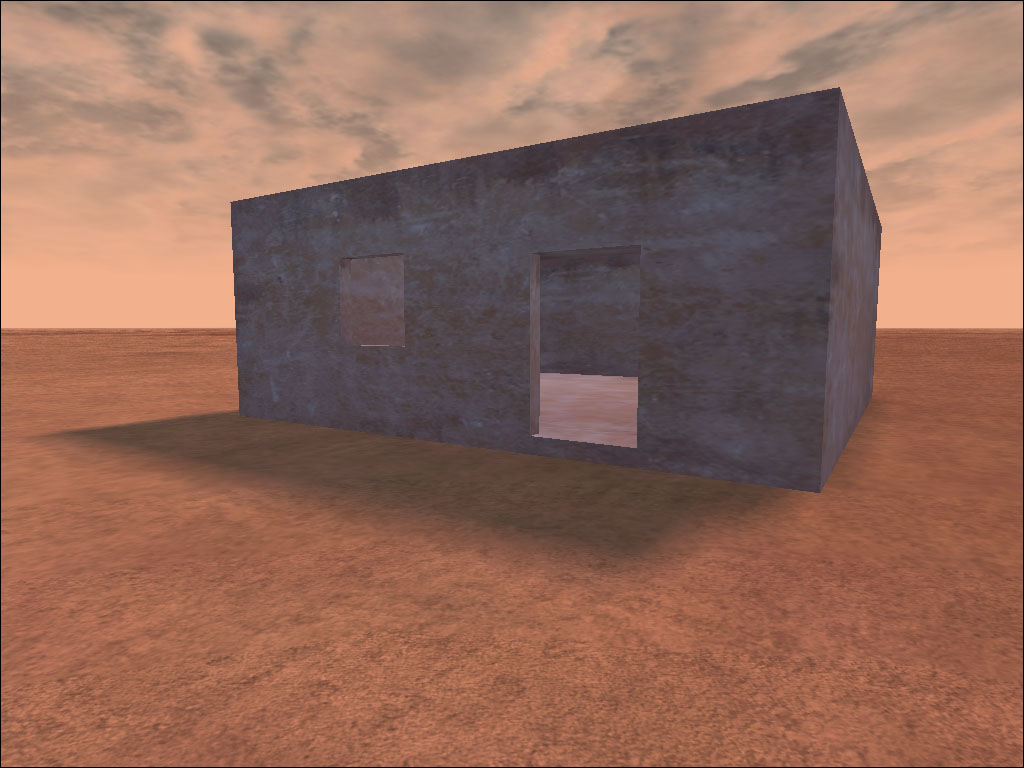
In this tutorial we will make a basic Hut we will put in the game.
Some tools you will need are:
PFF7 Extractor( to extract the items.def file)
Packit (to Pack the model and files into the .pff)
3DSMAX (to make the Model)
DeSCR (to Decrypt/Encrypt the items file)
A image to use for walls (google .tga wall texture for examples)First off make a new folder on your Desktop called BHD_Hut, add you .tga image and call it 01hut.tga Make sure it is about 256x256px
Open 3DMAX
Lets start by making a box 10m width 10m long and 4m High
0 out the X Y grid values at the bottom
Make another box inside that one 9.5m x 9.5m x 3.5m
0 out that box so it fits neatly inside the other one
Now change the Z grid value of box2 to 0.25m
The reason for the smaller box is it's our wall thickness is 0.25m x2 = 0.50m for both walls. We raised the center box .25m so we have an even distance all around.
On the top right drop down menu, Standard Primitives change it Compound Objects
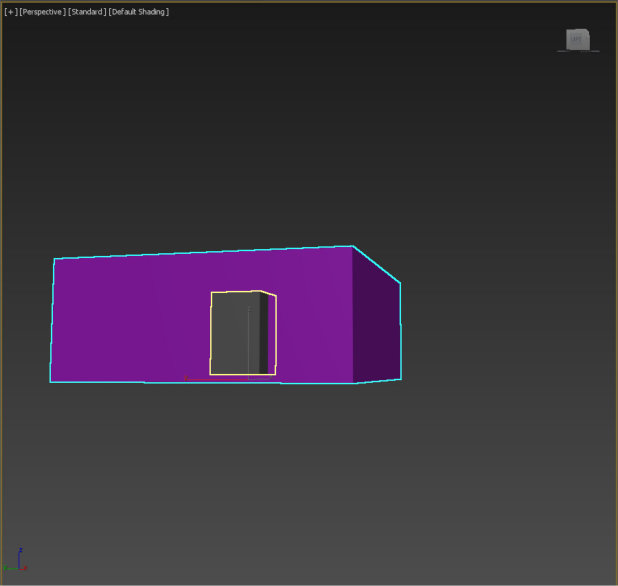
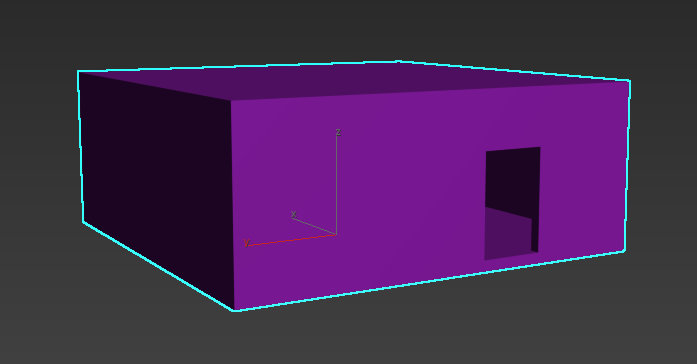
Click on box1 so it's high lighted, now click on ProBoolean, Just click on Start Picking. Now click the item you want to disappear which is the inner box, the way to do this is to click on box2 from the left had side naming list. Just click it and your done. Box1 is now a hollow building with no windows or doors
Change back to Standard Primitives
Create another box 1.5m wide 1.5m long 2.4m high
Change the Z grid value at the bottom to 0.25m
This will be the doorway, so move box3 halfway into box1 where you want your door frame cut out.
We lift the doorway 0.25m so it is the same height as cut out interior floor.
Do the same as last time, ProBoolean, Start Picking, click on box3.
Now you should see the doorway cutting and that the inside is empty
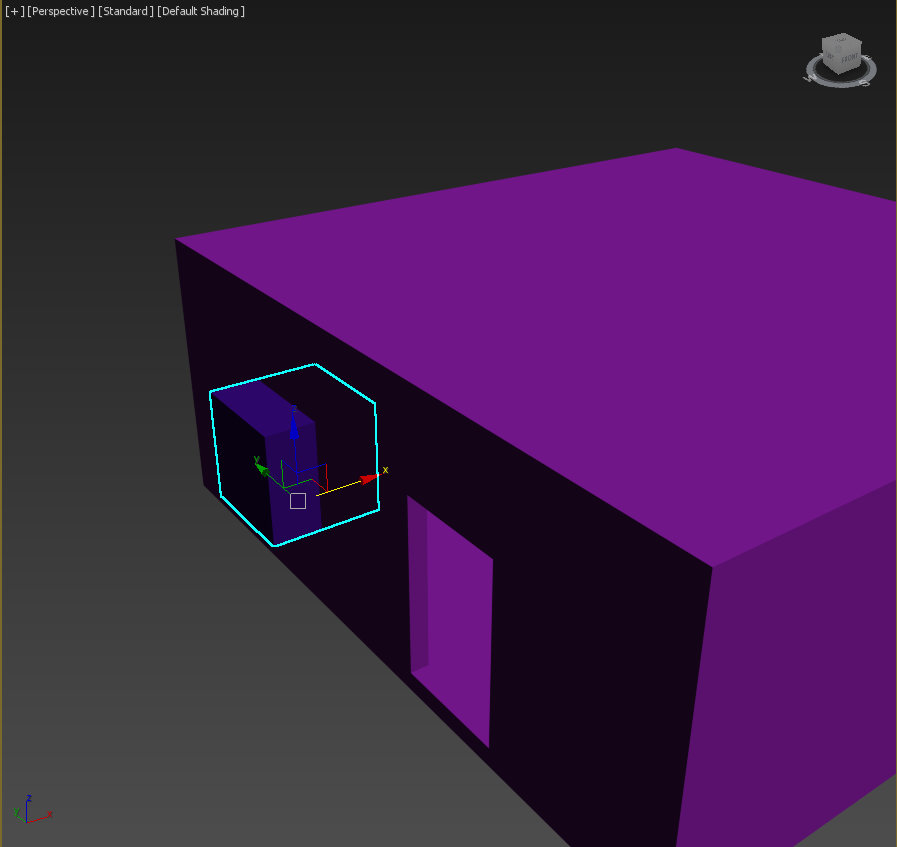
Next is a window, make another box 1.5m x 1.5m x 1.5m
This time we want the Z grid value set to 1.4
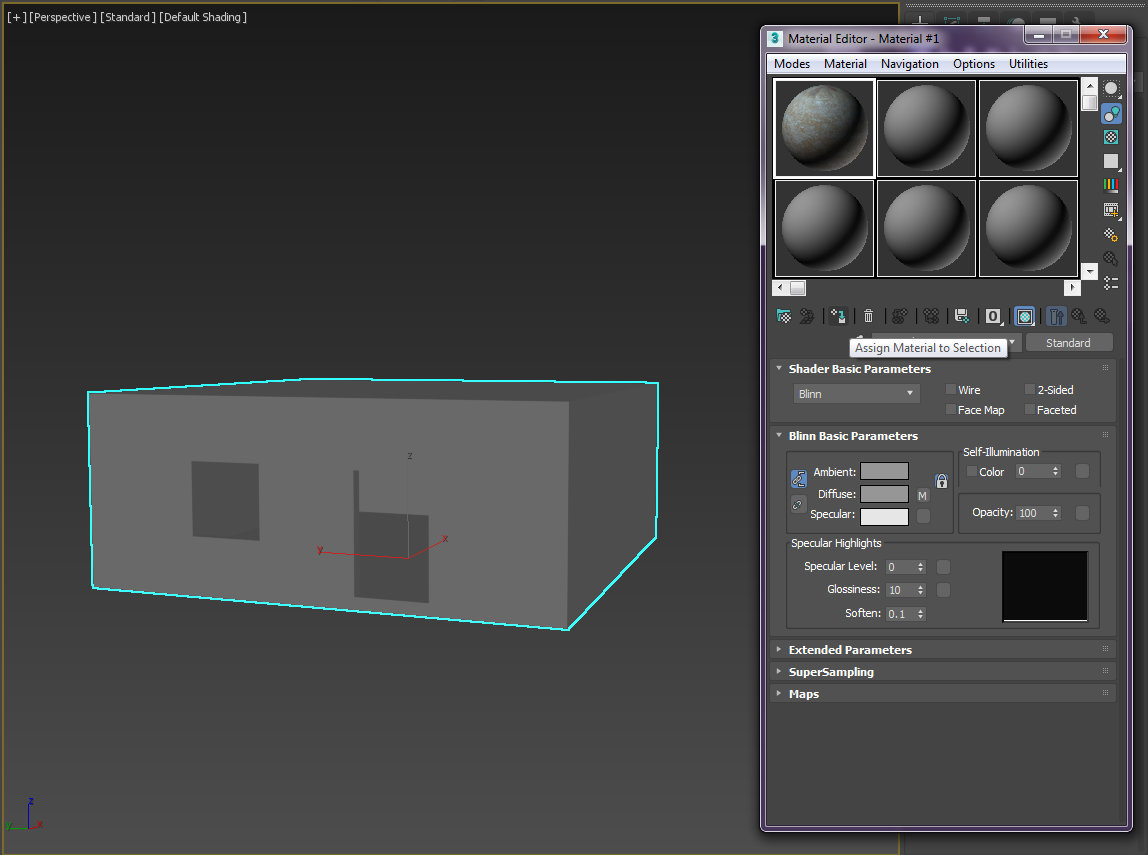
Next we will add a skin to it to give it a look, so open the Material Editor by going to the top and click on Rendering Button, on the drop down click Material Editor and over to Compact Material Editor,
Open the BHD_Hut folder and drag 01hut.tga into the editor
Highlight the model, click on the Assign Material Selection, now you should see a skinned hut
Next we need CB's Collision Boxes so you can't walk thought the building.
Make a box 10m x10m and 0.25m high, 0 the grid value out so it sits perfectly on the bottom, this will be the floor
Before going any further lets get the naming sorted out or it will get messy.
Box1 we will renamed to 01_hut, box5 we will call CB01_hut. All CB's will be named the same. If you still have box 2,3,4 listed just delete them.
Ok clone CB01_hut and change the Z value to 3.75m, this will be the roof
For the sides, make a box 10m x 0.25m x 4m, clone it twice to give you 3 side. You will have to rotate them and move them into position. Make sure you name everything CB01_hut
The front Collision boxes can't have holes in them so you have to make pieces to go around the window and doorway. This will take another 5 CB's to fill inIt should look something like below
Last thing to do is add 2 more boxes _01 and UDG01
What we do here is make a box .05 x .05 x .05 position it in the middle bottom call it _01, clone it and call this one UDG01
_01 is a center box and the UDG01 is a ground box
Save you project and Export as a ASE file to the BHD_Hut folder.
Now we have hut01.ASE and 01hut.tga image in the folder.Next we will had the information to the items.def
Install the PFF7 program, open and navigate to your BHD Game Folder, look for localres.pff and click on it.
Wait for it to load, at the bottom is a drop down menu called Filter, look for DEF. Now you have a small list of all the .def files in the game. We want the items.def, so highlight it, right click Extract to Desktop.
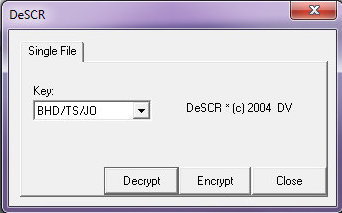
We need to Decrypt the file so we can read it, using the DeSRC tool from the BHD Mod Tools Kit Decrypt the file. A text file will appear on the Desktop ITEMS.DEF, delete the encrypted file now as we don't want it.
Open the items file using a text editor and add the following at line 8
begin "My Hut"
id 107000
type building
graphic hut01
endSave and close.
Open the DeSCR program again and this time we will Encrypt the items.def
Add the file to the BHD_Hut folder as that part is finished.
Create a Building from scratch and adding to game
In this tutorial we will make a basic Hut we will put in the game.
Some tools you will need are:
PFF7 Extractor( to extract the items.def file)
Packit (to Pack the model and files into the .pff)
3DSMAX (to make the Model)
DeSCR (to Decrypt/Encrypt the items file)
A image to use for walls (google .tga wall texture for examples)
First off make a new folder on your Desktop called BHD_Hut, add you .tga image and call it 01hut.tga Make sure it is about 256x256px
Open 3DMAX
Lets start by making a box 10m width 10m long and 4m High
0 out the X Y grid values at the bottom
Make another box inside that one 9.5m x 9.5m x 3.5m
0 out that box so it fits neatly inside the other one
Now change the Z grid value of box2 to 0.25m

The reason for the smaller box is it's our wall thickness is 0.25m x2 = 0.50m for both walls. We raised the center box .25m so we have an even distance all around.
On the top right drop down menu, Standard Primitives change it Compound Objects
Click on box1 so it's high lighted, now click on ProBoolean, Just click on Start Picking. Now click the item you want to disappear which is the inner box, the way to do this is to click on box2 from the left had side naming list. Just click it and your done. Box1 is now a hollow building with no windows or doors

Change back to Standard Primitives
Create another box 1.5m wide 1.5m long 2.4m high
Change the Z grid value at the bottom to 0.25m
This will be the doorway, so move box3 halfway into box1 where you want your door frame cut out.
We lift the doorway 0.25m so it is the same height as cut out interior floor.
Do the same as last time, ProBoolean, Start Picking, click on box3.
Now you should see the doorway cutting and that the inside is empty
Next is a window, make another box 1.5m x 1.5m x 1.5m
This time we want the Z grid value set to 1.4
Next we will add a skin to it to give it a look, so open the Material Editor by going to the top and click on Rendering Button, on the drop down click Material Editor and over to Compact Material Editor,
Open the BHD_Hut folder and drag 01hut.tga into the editor
Highlight the model, click on the Assign Material Selection, now you should see a skinned hut

Next we need CB's Collision Boxes so you can't walk thought the building.
Make a box 10m x10m and 0.25m high, 0 the grid value out so it sits perfectly on the bottom, this will be the floor
Before going any further lets get the naming sorted out or it will get messy.
Box1 we will renamed to 01_hut, box5 we will call CB01_hut. All CB's will be named the same. If you still have box 2,3,4 listed just delete them.
Ok clone CB01_hut and change the Z value to 3.75m, this will be the roof
For the sides, make a box 10m x 0.25m x 4m, clone it twice to give you 3 side. You will have to rotate them and move them into position. Make sure you name everything CB01_hut
The front Collision boxes can't have holes in them so you have to make pieces to go around the window and doorway. This will take another 5 CB's to fill in
It should look something like below

Last thing to do is add 2 more boxes _01 and UDG01
What we do here is make a box .05 x .05 x .05 position it in the middle bottom call it _01, clone it and call this one UDG01
_01 is a center box and the UDG01 is a ground box

Save you project and Export as a ASE file to the BHD_Hut folder.
Now we have hut01.ASE and 01hut.tga image in the folder.
Next we will had the information to the items.def
Install the PFF7 program, open and navigate to your BHD Game Folder, look for localres.pff and click on it.
Wait for it to load, at the bottom is a drop down menu called Filter, look for DEF. Now you have a small list of all the .def files in the game. We want the items.def, so highlight it, right click Extract to Desktop.

We need to Decrypt the file so we can read it, using the DeSRC tool from the BHD Mod Tools Kit Decrypt the file. A text file will appear on the Desktop ITEMS.DEF, delete the encrypted file now as we don't want it.
Open the items file using a text editor and add the following at line 8
begin "My Hut"
id 107000
type building
graphic hut01
end
Save and close.
Open the DeSCR program again and this time we will Encrypt the items.def
Add the file to the BHD_Hut folder as that part is finished.
Quote from 2DNED on February 1, 2022, 9:11 amOED
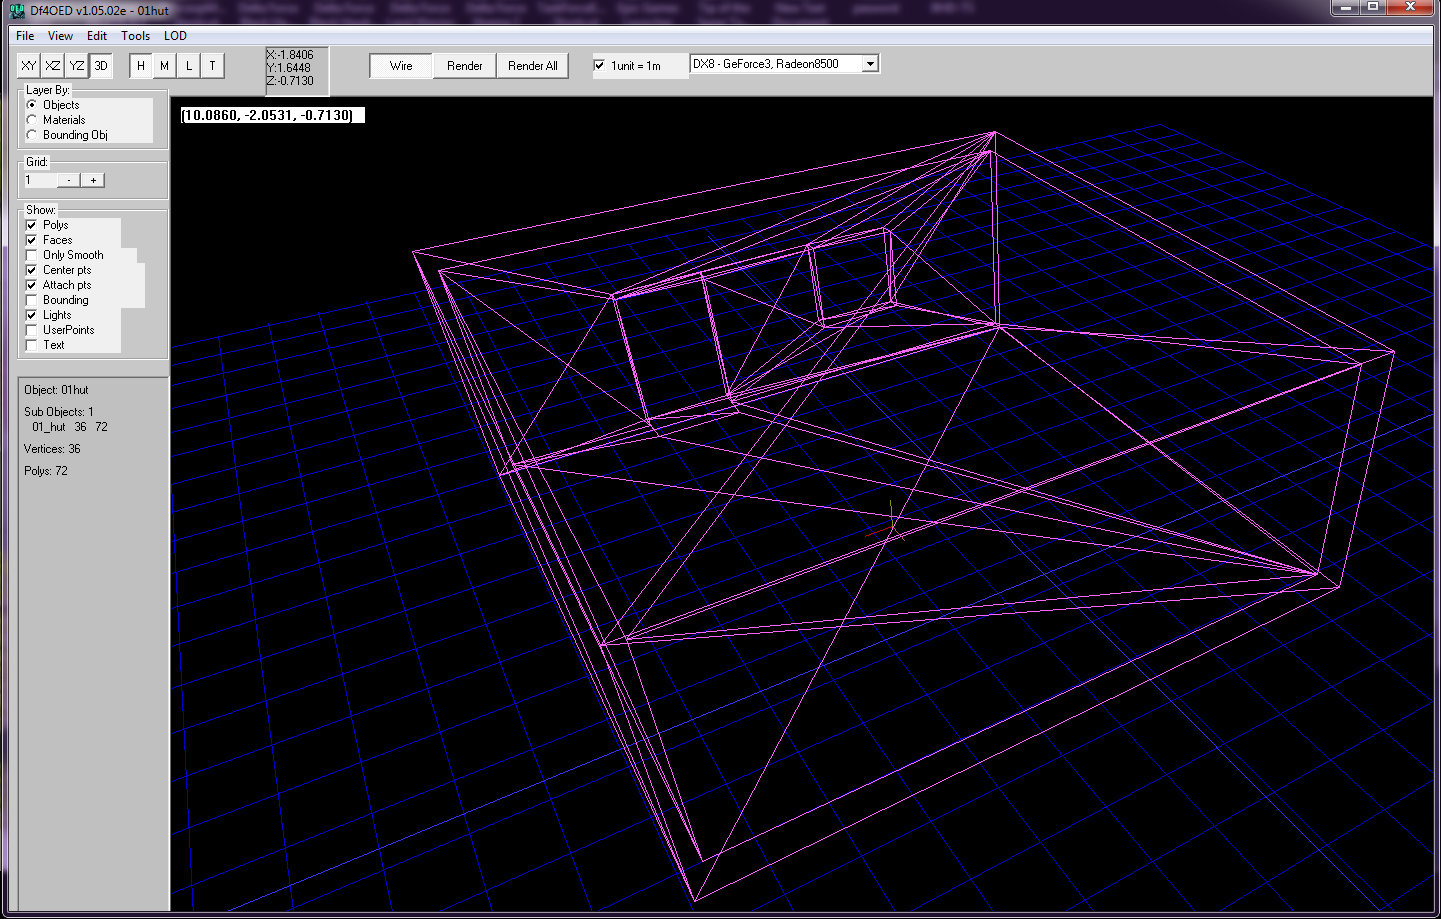
Next step is bring it into the oed to convert the ase to a 3di.
Grab the oed from the BHD Tool Kit, put it on your desktop for now and openFirst thing to do is make sure the is a checkbox 1Unit=1m is ticked.
Next we will set the path so click on Tools > Options and set the paths to BHD_Hut folder
Go File > Import 3DS ASCII, select Hut01.ase we created earlier.
You should see a pink 3d frame of your object, using the XY, XZ, YZ, 3D buttons you can change your view but we will click on Render, this will show us the model with the skin ready to export. If you use the number keypad on your keyboards you can rotate and change the the view while rendered.
Ok now we will go to Edit > General Information
Change the Rendering Function drop down box to bldg
At the bottom change Collision data to Med Res
Back to File > Export 3DI, navigate to your BHD_Hut folder and save as Hut01.3diNow we have our first model ready to go into the game and the information for the game to read it.
Next Step is to pack it into a pffIf your modding for JO/DFX it is all the same process you just use the SuperOED from the JO Mod Tools
OED
Next step is bring it into the oed to convert the ase to a 3di.
Grab the oed from the BHD Tool Kit, put it on your desktop for now and open
First thing to do is make sure the is a checkbox 1Unit=1m is ticked.
![]()
Next we will set the path so click on Tools > Options and set the paths to BHD_Hut folder
Go File > Import 3DS ASCII, select Hut01.ase we created earlier.
You should see a pink 3d frame of your object, using the XY, XZ, YZ, 3D buttons you can change your view but we will click on Render, this will show us the model with the skin ready to export. If you use the number keypad on your keyboards you can rotate and change the the view while rendered.
Ok now we will go to Edit > General Information
Change the Rendering Function drop down box to bldg
At the bottom change Collision data to Med Res
Back to File > Export 3DI, navigate to your BHD_Hut folder and save as Hut01.3di
Now we have our first model ready to go into the game and the information for the game to read it.
Next Step is to pack it into a pff
If your modding for JO/DFX it is all the same process you just use the SuperOED from the JO Mod Tools
Quote from 2DNED on February 1, 2022, 10:32 amPacking for game use
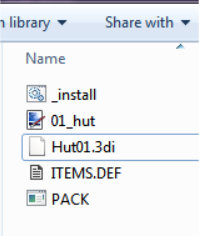
So we have all the files we need for the moment in the BHD_Hut folder
01hut.tga
Hut01.3di
Hut01.ase
ITEMS.defGrab a copy of the Pack tool and edit the install file to reflect the name of your mod e.g. change all pff entries to mymod.pff
Or just grab the one i supplied at the end of the tutorial.I want to call my new mod df-mods, so i have setup the index file to suit.
Now copy the Hut01.3di, 01hut.tga and the ITEMS.def into the Pack folder
Click on install and a new file will appear df-mods.pff and the items you had in there are now packed into the pff
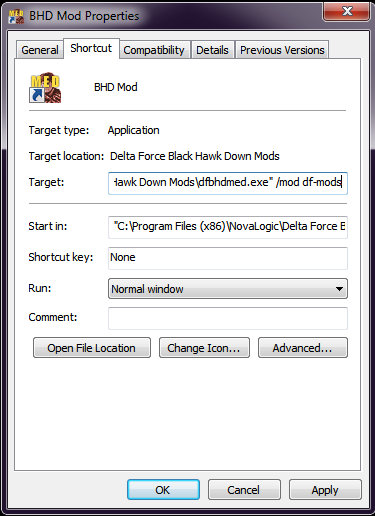
Now go to your BHD Directory and make a new folder called Mod. Copy the df-mods.pff into that folder /Mods/df-mods.pff
While you in the main directory make 2 new short cuts for the BHD Game and the Med on your desktop.Re name the shortcuts to BHD Mod and BHD Mod Med
Right click > Properties change the Target line to "C:\Program Files (x86)\NovaLogic\Delta Force Black Hawk Down\dfbhdmed.exe" /mod df-mods
If everything has gone right we should be able to open the BHD Mod Med and insert the new model into a map
Make you map with a start player and your new Hut and that is it! You have made your first mod. Very simple and basic but it will get you started.
Packing for game use
So we have all the files we need for the moment in the BHD_Hut folder
01hut.tga
Hut01.3di
Hut01.ase
ITEMS.def
Grab a copy of the Pack tool and edit the install file to reflect the name of your mod e.g. change all pff entries to mymod.pff
Or just grab the one i supplied at the end of the tutorial.
I want to call my new mod df-mods, so i have setup the index file to suit.
Now copy the Hut01.3di, 01hut.tga and the ITEMS.def into the Pack folder
Click on install and a new file will appear df-mods.pff and the items you had in there are now packed into the pff
Now go to your BHD Directory and make a new folder called Mod. Copy the df-mods.pff into that folder /Mods/df-mods.pff
While you in the main directory make 2 new short cuts for the BHD Game and the Med on your desktop.
Re name the shortcuts to BHD Mod and BHD Mod Med
Right click > Properties change the Target line to "C:\Program Files (x86)\NovaLogic\Delta Force Black Hawk Down\dfbhdmed.exe" /mod df-mods
If everything has gone right we should be able to open the BHD Mod Med and insert the new model into a map

Make you map with a start player and your new Hut and that is it! You have made your first mod. Very simple and basic but it will get you started.
Quote from 2DNED on February 1, 2022, 11:27 amMed Pic
The last thing we need as a Med Pic for the Editor.
One way to do this is add your item to a map, add a tunnel piece and raise it to above ground level. When you look out the tunnel only show item not the terrain
Now you have taken a Screen Shot is F11 grab it from your directory ss00000.pcx
Open it with PhotoShop or what ever program you have and resize it to 200 x 200 and naming it Hut01.pcx
Use the Pack program to pack the image and copy the new pff over to the directoryOpen the Med Editor up go to your model Hut01 and you will see an image there now.
Med Pic
The last thing we need as a Med Pic for the Editor.
One way to do this is add your item to a map, add a tunnel piece and raise it to above ground level. When you look out the tunnel only show item not the terrain

Now you have taken a Screen Shot is F11 grab it from your directory ss00000.pcx
Open it with PhotoShop or what ever program you have and resize it to 200 x 200 and naming it Hut01.pcx
Use the Pack program to pack the image and copy the new pff over to the directory
Open the Med Editor up go to your model Hut01 and you will see an image there now.

Quote from 2DNED on February 1, 2022, 3:33 pmExplanation
Why 2 new icons with /mod df-mods added?
If we make a mod this way you can still use your BHD Game Icons as original to join normal servers and have the BHD Mod Icons separate for the Mod Server only.[space]/mod = read from folder called Mod, df-mods is the name of the mod.
You can also use [space]/d after the target info which will read from the Directory (Game Folder). Using this method you can add the items we packed directly into the Game Folder instead of using a pff. The down side is, if you join any server you will be punted because files have been changed.
Explanation
Why 2 new icons with /mod df-mods added?
If we make a mod this way you can still use your BHD Game Icons as original to join normal servers and have the BHD Mod Icons separate for the Mod Server only.
[space]/mod = read from folder called Mod, df-mods is the name of the mod.
You can also use [space]/d after the target info which will read from the Directory (Game Folder). Using this method you can add the items we packed directly into the Game Folder instead of using a pff. The down side is, if you join any server you will be punted because files have been changed.
Quote from 2DNED on February 2, 2022, 2:30 pmSo we made a basic building and imported it into our game.
I will make another simple building the same just longer windows and 2 doorways.
Ok now lets change the texture and add a 711 Logo
From here you could add some inner walls, glass, hinged doors... what ever you can think of.
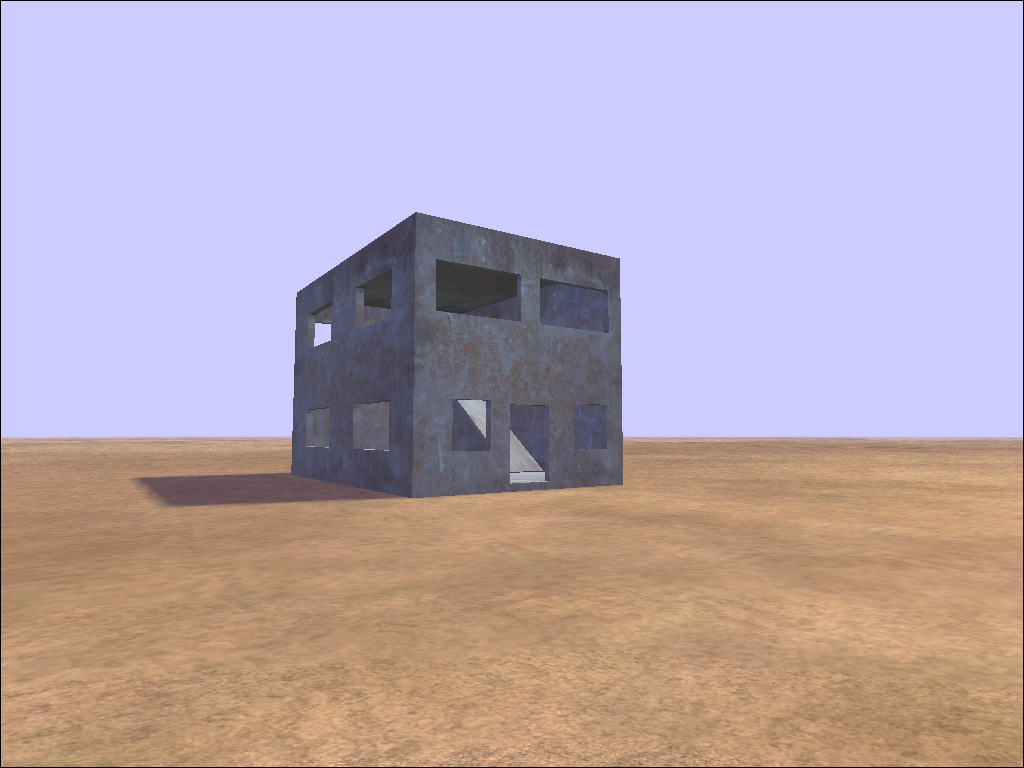
Experimenting a bit more, you could try making a 2 story building in 3DSMax
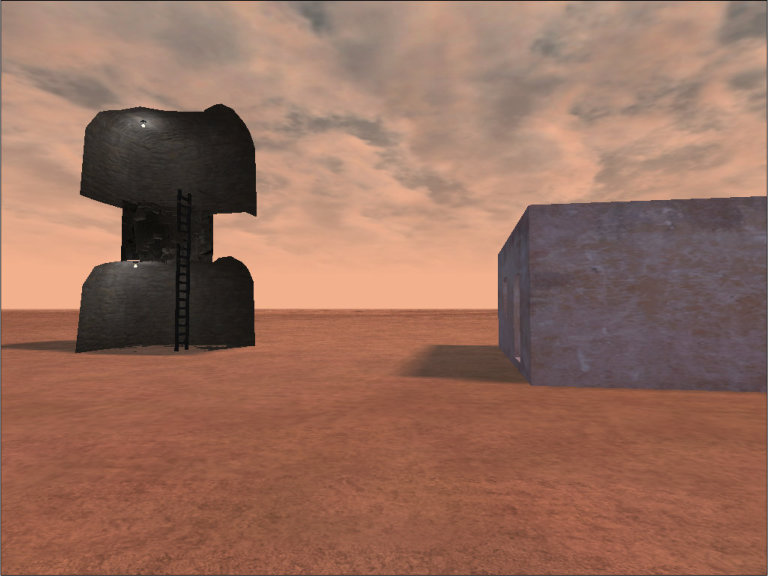
It is endless as to how far you can go with making building, here is a stack able one i made
So we made a basic building and imported it into our game.
I will make another simple building the same just longer windows and 2 doorways.

Ok now lets change the texture and add a 711 Logo

From here you could add some inner walls, glass, hinged doors... what ever you can think of.
Experimenting a bit more, you could try making a 2 story building in 3DSMax

It is endless as to how far you can go with making building, here is a stack able one i made
